To begin this project, I have decided to set up the camera and map scrolling. I chose to start here because it seems like quite a difficult thing to implement without having any previous knowledge of Phaser so I will likely learn a lot quite quickly.
I have decided on a 3200x3200px map image and an 800x800px camera area. My plan is to break this into tiles which I will dynamically load and offset based on the current player position. I made this decision because it seems like it would be a waste of resources having the entire map loaded and redrawn every frame. I created this function called DrawMap() which would calculate the current min/max x/y positions of the viewport and then call another function (GetTile()) which used that position to find which of the game’s tiles each one of those positions were located in.
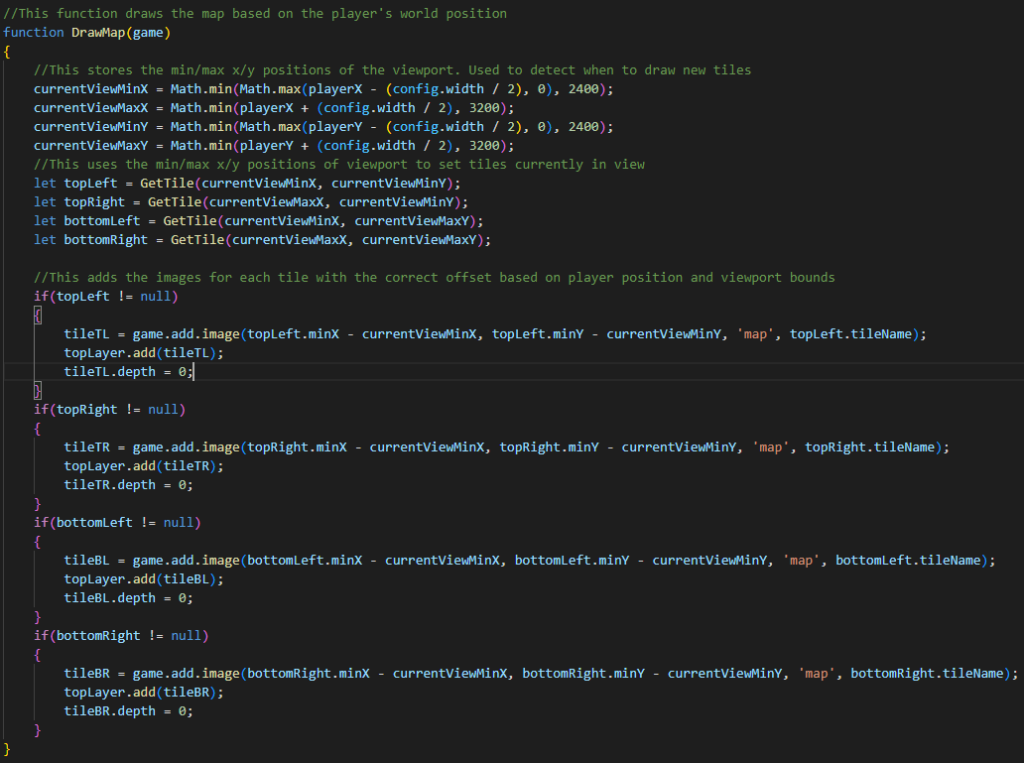
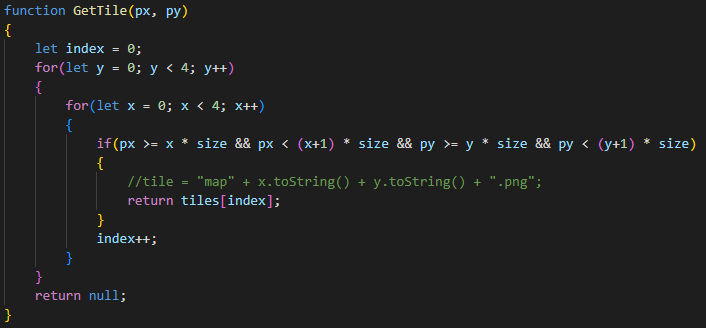
Together these functions redraw the map every frame based on the position of the player which is exactly what I wanted for this game. However, after doing some further research on how games are made in Phaser, I came across this page:
How to Create a Game with Phaser 3
GameDev Academy (2019)
From reading this post I noticed that there was already a built-in camera class in Phaser 3. I found this class in the documentation for Phaser and decided I would switch to this solution as it was basically a ready-made version of what I was trying to create. With the built-in camera system implemented I managed to reduce the amount of code required to make this work to 5/6 lines.
After doing some testing with the player and the new camera system I began to feel that the world was too big for what I wanted to create. I decided to ditch the 3200px map made from 800px squares and reduce it to a single 1600px map. This was easily accomplished with a single map image file. Using the built-in camera class in Phaser 3 the map was now scrolling correctly and I was ready to start working on the next step – adding enemies!