With the bulk of the main gameplay finished it was time to add some menus. I wanted to have a “Start” screen and a “Game Over” screen with a button to return you to the Start screen. I also decided that I would like to have a character select option on the Start screen which would set the player sprite accordingly.
Initially I thought that using Phaser’s built-in scene system might work for this. After spending a little time attempting to correctly wrap my existing code in the scene logic I realised that I would need to rewrite much of it in order for it to work. Considering my project was sitting at around 800 lines of code at this time I decided to save myself some work and create my own solution for this instead.
My idea was simple – I would create a global variable to hold the name of the current scene. I would then wrap the logic for the creation of each different scene (Start, Game and Game Over) inside an if statement in the create() function. Then each time the scene was meant to change I would change the scene name variable to the name of the current scene and call the create() function again.
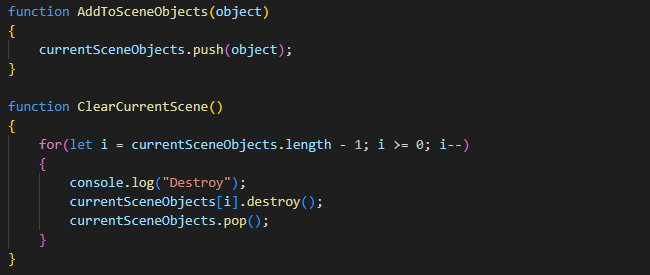
This solution worked well except for one thing – every time the scene was supposed to change the objects from the previous scene remained on the screen. I spent a lot of time looking for existing methods in Phaser which might help me to overcome this but there was nothing suitable already implemented. So instead I made a custom solution for clearing the scene – every time an object gets created it gets added to a global scene objects array using a custom function. Then just before the scene changes a custom function is called which handles the clearing up of these objects. This involves looping through them and destroying them one by one then removing them from the array. Here are the two scene management functions:
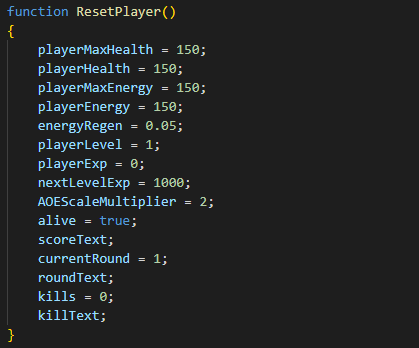
Another thing to handle was the resetting of in-game variables such as the player health, level, round count and kill count. This was achieved by creating a simple function which reset all of these to a default value. This function gets called when the “Restart” button on the Game Over screen is pressed.
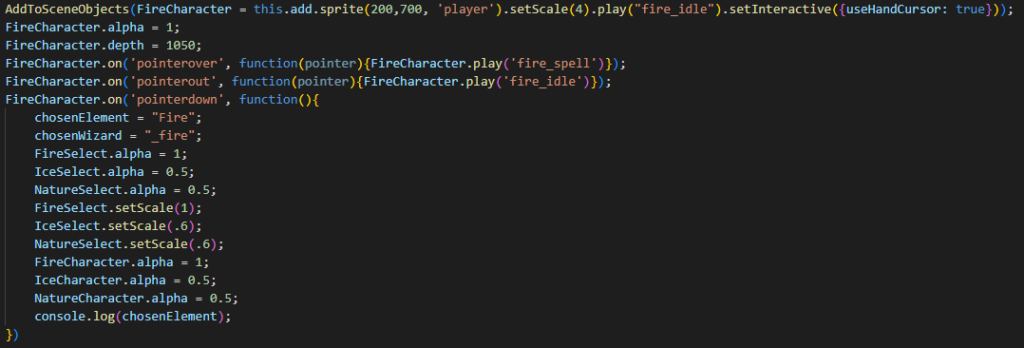
All that is left to do for the Start scene is to add the buttons for a player to select their wizard. I decided to add some simple effects to make the buttons look better when they are interacted with. One of the functions in this code will make a wizard play an animation when the mouse hovers over them. It then stops the animation when the mouse leaves. There is another function to change the alpha and scale of the selected wizard to make it clear which one is chosen. Here is the code which adds the fire character button to the screen and sets up the interactivity:
And here is the final Start screen complete with character select and some other elements:

At this point the game loop is complete and it is time to do some playtesting.